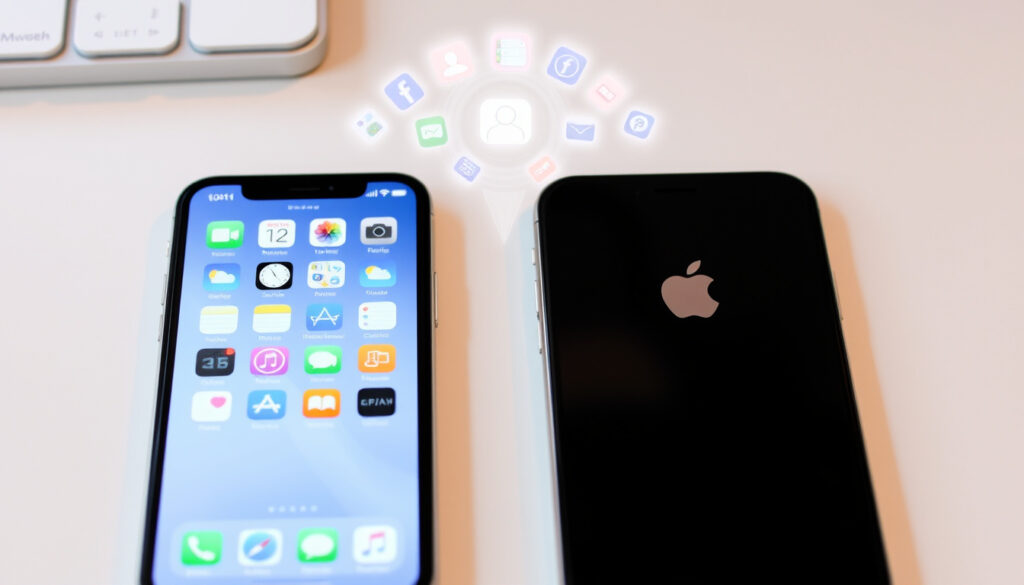
How to Transfer Data from iPhone to iPhone – All Official Methods
Transferring data between iPhones has become increasingly streamlined, with Apple offering multiple methods to suit different situations and preferences. Whether setting up a new device or migrating to a replacement iPhone, users have access to wireless options, cloud-based solutions, and computer-assisted transfers that can accommodate various technical comfort levels and circumstances.
This guide covers all official transfer methods endorsed by Apple, including Quick Start, iCloud backup restoration, and computer-based transfers using Finder or iTunes. Each approach carries distinct advantages depending on whether devices need to be in proximity, whether cloud storage is available, and how quickly users need their new device operational.
Understanding the differences between these methods helps ensure data integrity during the transfer process, particularly for sensitive information such as health records, saved passwords, and application data that may not migrate automatically across all transfer methods.
How to Use Quick Start to Transfer Data from iPhone to iPhone
Quick Start represents Apple’s most direct method for transferring data between devices, enabling a private wireless connection between two iPhones without requiring iCloud storage or a computer. This approach transfers data directly from one device to another, making it the fastest option when both phones are available throughout the process.
Overview of Transfer Methods
Direct device-to-device transfer via private wireless connection
Wireless restoration from cloud-stored backup
Encrypted backup via Finder or iTunes
iCloud sync or manual transfer after initial setup
Key Insights for Choosing Your Transfer Method
- Quick Start requires both devices to be nearby and available for the entire transfer duration
- iCloud transfers allow immediate use of your new device while data downloads in the background
- Computer-based transfers are essential for preserving Health data and saved passwords
- Both devices must run iOS 12.4 or later to use Quick Start
- Quick Start does not require iCloud storage or a computer to complete the transfer
- Transfer times vary based on network conditions and the amount of data being moved
- Direct iPhone-to-iPhone transfers create a private connection that does not use internet bandwidth
| Method | Requirements | Typical Time | Data Types Transferred |
|---|---|---|---|
| Quick Start | Wi-Fi, Bluetooth, nearby devices | 30-60 minutes | All data types |
| iCloud Backup | iCloud storage allocation | Varies by connection speed | Most data types |
| Computer (Finder/iTunes) | USB cable, computer, storage space | 45-90 minutes | All including Health |
| Post-Setup iCloud | iCloud account, storage | Several hours | Synced content only |
| Manual Transfer | Internet connection, time | Varies significantly | Selected content |
| Encrypted Backup | Computer, USB, password | 60+ minutes | Complete backup |
Step-by-Step Quick Start Process
- Ensure your current iPhone is connected to Wi-Fi with Bluetooth turned on
- Turn on your new iPhone and place it near your current device
- Follow the onscreen instructions and tap Continue when the Quick Start prompt appears
- Scan the animation displayed on your new iPhone using your old iPhone’s camera
- Enter your old iPhone’s passcode on the new device when prompted
- Set up Face ID or Touch ID on your new iPhone
- Select “Transfer from iPhone” to move data directly between devices
- Keep both devices near each other and plugged into power until the transfer completes
Both devices must remain within range of each other throughout the entire Quick Start transfer process. According to Apple’s official documentation, interruption of the connection may result in incomplete data transfer and require restarting the process.
How to Transfer Data from iPhone to iPhone with iCloud
iCloud-based transfers offer flexibility for users who prefer not to keep devices physically close during the migration process. This method involves creating a backup of your current iPhone that can be restored to a new device from any location with internet connectivity, making it particularly useful for those receiving replacement devices by mail or setting up multiple devices sequentially.
Preparing Your iCloud Backup
Before initiating an iCloud transfer, ensure your current iPhone has sufficient iCloud storage allocated and that a recent backup exists. The preparation process requires accessing your Apple ID settings and confirming backup parameters before proceeding with device setup.
- On your old iPhone, open Settings and tap your Apple ID at the top of the screen
- Select iCloud, then choose iCloud Backup from the menu options
- Tap “Back up now” to create an immediate backup of your current device
- Wait for the backup to complete, verifying the timestamp in the backup confirmation
- During new iPhone setup, choose to download from iCloud rather than transfer directly from your old device
- Your apps and data will begin downloading in the background, allowing you to start using your new iPhone immediately
Unlike direct device transfers that require waiting for completion, iCloud’s background download feature enables immediate use of your new iPhone. You can begin configuring settings, installing additional apps, and using your device while larger files continue downloading from iCloud servers.
Key Differences Between Download Options
When setting up a new iPhone, two distinct paths emerge from the iCloud and Quick Start processes. The first option downloads your data directly from iCloud servers, allowing immediate device access while transfers complete. The second option, labeled “Transfer from iPhone,” requires waiting for the transfer to complete on both devices before proceeding.
Users selecting the download from iCloud option should expect varying completion times based on their internet connection speed and the total amount of data stored in their backup. Apple recommends maintaining a stable Wi-Fi connection throughout the process to prevent interruption.
How to Transfer iPhone to iPhone Without iCloud
Many users prefer to keep their data within their own possession rather than storing it in cloud services. Apple provides alternative pathways that accomplish complete device migration without requiring iCloud, primarily through Quick Start’s direct transfer functionality or computer-based encrypted backups.
Direct Transfer Without iCloud
The Quick Start feature includes a “Transfer from iPhone” option that performs data transfer directly between devices over a private wireless connection. This method maintains the convenience of wireless transfer while keeping all data contained within the two devices involved in the migration.
- Connect your old iPhone to Wi-Fi and enable Bluetooth
- Power on your new iPhone and position it near the old device
- Wait for the Quick Start prompt to appear on both screens
- Follow the onscreen instructions to establish the connection
- Select “Transfer from iPhone” when prompted during setup
- Allow the transfer to complete while both devices remain powered and nearby
Direct iPhone transfers require both devices to remain within communication range throughout the process. Relocating either device or experiencing significant wireless interference may interrupt the transfer, potentially affecting data integrity. Maintaining proximity and a stable power connection helps ensure successful completion.
Computer-Based Transfer Option
For users who prefer complete physical control over their data migration, creating an encrypted backup on a computer provides an alternative that bypasses cloud services entirely. This approach uses Finder on Mac computers running macOS Catalina or later, or iTunes on Windows PCs and older Mac systems.
The encrypted backup method proves particularly valuable when transferring sensitive information that requires preservation, including health data and saved passwords. These categories of data may not automatically migrate through other methods, making the encrypted computer backup essential for users who cannot afford to lose access to this information.
After creating the encrypted backup on the computer, the restore process occurs during new iPhone setup, with the device pulling all data from the locally stored backup rather than cloud sources.
How to Transfer Data from iPhone to iPhone Wirelessly or After Setup
Situations arise where users need to transfer data after completing the initial device setup, or where wireless methods beyond Quick Start become necessary. Understanding post-setup transfer options expands the available strategies for device migration regardless of when the transfer need becomes apparent.
Transferring After Initial Setup
If your new iPhone has already completed its initial setup without transferring data from your old device, iCloud remains the primary pathway for subsequent migration. This involves enabling iCloud on your new device and allowing content to sync from your connected Apple ID.
- Sign in to iCloud on your new iPhone using the same Apple ID as your old device
- Navigate to Settings and enable the specific data categories you wish to transfer
- Photos, documents, and app data will begin syncing automatically
- Allow sufficient time for large libraries to complete the download process
- Check individual app settings for additional sync options specific to those applications
Post-setup transfers through iCloud allow selective synchronization rather than full device migration. This means you can choose exactly which categories of data transfer to your new device, potentially managing storage more efficiently than complete device transfers.
Manual Data Transfer Methods
For content not automatically captured in iCloud backups, manual transfer methods provide additional pathways. AirDrop enables direct wireless transfer of specific files between devices, while cloud storage services like iCloud Drive, Dropbox, or Google Drive can facilitate transfer of large media libraries or documents.
Individual apps often include their own export and import functionality that can move data independently of system-level transfer methods. Checking within specific applications for settings related to backup, export, or data portability often reveals additional transfer capabilities.
Alternative Wireless Methods
Beyond Apple’s native solutions, several third-party applications enable wireless transfer between iPhones. These applications typically require both devices to be connected to the same Wi-Fi network and may offer features not available in Apple’s standard transfer options, such as selective file-type transfer or direct peer-to-peer connections without network infrastructure.
Timeline: Estimated Transfer Times by Method and Data Volume
Understanding expected transfer durations helps users plan their device migration appropriately. Several factors influence actual transfer times, including network conditions, data volume, device generation, and whether encryption is involved.
- Quick Start with Transfer from iPhone (Full Data): 30-90 minutes depending on data volume and device proximity
- iCloud Download to New Device: 1-4 hours based on internet speed and backup size
- Encrypted Computer Backup Creation: 45-120 minutes for comprehensive backup generation
- Post-Setup iCloud Sync: 2-8 hours for large photo libraries and extensive app data
- Individual App Data Transfers: Varies by application and data type
- Direct File Transfer via AirDrop: 5-30 minutes for selected content
Transfer durations specified represent typical ranges under normal conditions. Actual completion times may exceed estimates when network congestion occurs, when devices experience interference, or when exceptionally large data sets are involved. Apple recommends maintaining stable conditions throughout the transfer process to achieve optimal completion times.
What Is Confirmed and What Remains Unclear About iPhone Data Transfer
Apple’s official documentation confirms several aspects of iPhone-to-iPhone data transfer while certain details remain subject to variation based on specific circumstances and device configurations.
| Established Information | Uncertain or Variable Information |
|---|---|
| Quick Start requires iOS 12.4 or later | Actual transfer speed varies by device generation |
| Direct transfer uses private wireless connection | Specific data type compatibility varies by app |
| iCloud backup preserves most user data | Health data transfer success depends on encrypted backup |
| Finder/iTunes create complete encrypted backups | Third-party app data may or may not transfer |
| Background download enables immediate device use | Transfer interruption outcomes depend on completion point |
| Both devices must remain nearby during Quick Start | Storage requirements vary significantly by data composition |
Before completing device migration, verify that critical data has transferred successfully. Some data types, particularly from third-party applications, may require manual verification or additional transfer steps. Checking settings within individual applications after setup completion helps identify any gaps in the migration process.
Understanding iPhone Data Transfer Methods and Their Applications
The evolution of iPhone data transfer reflects Apple’s broader strategy toward seamless device experiences. Each method addresses specific use cases while maintaining consistent focus on data security and user convenience. Quick Start emphasizes immediacy and direct device-to-device control, iCloud provides geographic flexibility, and computer-based transfers offer maximum data preservation for sensitive information.
Compatibility extends across iPhone generations, with Quick Start supporting devices running iOS 12.4 and later. This broad version support ensures that even users transitioning from older devices can utilize the direct transfer method without requiring specific hardware generations on both devices.
The emergence of post-setup transfer options acknowledges that not all device migrations occur under ideal circumstances. Users who have already configured their new iPhone retain pathways for data migration through iCloud synchronization and manual transfer methods, ensuring that device replacement remains possible regardless of setup timing.
Official Sources and Documentation for iPhone Data Transfer
Apple maintains comprehensive support documentation for all official data transfer methods. Their official guide covers Quick Start requirements, setup procedures, and troubleshooting steps for wireless transfers between iPhones. The documentation specifies that devices must run iOS 12.4 or later and emphasizes the importance of maintaining device proximity and power connection throughout the transfer process.
Quick Start uses your iPhone’s camera to read a pattern displayed on your new device, then uses that information to set up your new iPhone securely. You can then transfer data from your previous iPhone directly to your new one.
Apple Support Documentation
Additional documentation addresses encrypted backup creation through Finder and iTunes, noting that these methods are essential for preserving health data and saved passwords that may not transfer through other pathways. The official guidance recommends encrypted backups specifically when complete data preservation is required.
When you use a encrypted backup and transfer it to your device, your passwords and health data are included, ensuring your information transfers completely and securely.
Apple Support Documentation
Summary: Choosing the Right iPhone Data Transfer Method
Selecting the appropriate data transfer method depends on your specific circumstances, including device availability, storage access, and data sensitivity requirements. Quick Start offers the most direct experience when both devices are accessible, while iCloud provides flexibility for geographically distributed migrations. Computer-based transfers remain essential for users requiring complete data preservation including health information and saved credentials.
For users in the United Kingdom or those requiring carrier-specific guidance, additional resources may address regional considerations and network-specific configurations that affect transfer performance and compatibility.
Frequently Asked Questions
How do I transfer data from an older iPhone to iPhone 17?
iPhone 17 supports all official transfer methods including Quick Start, iCloud backup restoration, and computer-based transfers. Quick Start requires iOS 12.4 or later on your current device, meaning virtually any iPhone from recent years can transfer data directly to iPhone 17 using the “Transfer from iPhone” option.
Can I transfer data from iPhone to iPhone without resetting the new device?
If your new iPhone has already completed initial setup without transferring from your old device, you can still migrate data through iCloud synchronization. Sign in to iCloud on your new device using the same Apple ID, then enable the specific data categories you wish to transfer. This method allows selective migration without requiring device reset.
How long does it take to transfer data from iPhone to iPhone?
Transfer times vary significantly based on method and data volume. Quick Start direct transfers typically complete within 30-90 minutes. iCloud downloads may require 1-4 hours depending on internet speed and backup size. Post-setup syncs for large photo libraries can take several hours to complete fully.
Will my health data and passwords transfer automatically?
Health data and saved passwords require encrypted backup for complete transfer. Standard Quick Start and iCloud methods do not guarantee preservation of these sensitive data types. Creating an encrypted backup through Finder or iTunes before setup ensures these categories transfer successfully to your new device.
Do I need Wi-Fi to transfer data between iPhones?
Quick Start requires Wi-Fi for initial setup but transfers data directly between devices over a private wireless connection. iCloud transfers require internet connectivity for both backup creation and restoration. Computer-based transfers require Wi-Fi only if downloading iOS updates; otherwise, a USB connection suffices for the actual data transfer.
What happens if the iPhone transfer is interrupted?
Interrupted transfers may result in partial data transfer, requiring restart of the process. If using Quick Start, you can erase your new iPhone and begin again. For iCloud transfers, your backup remains intact on Apple’s servers, allowing you to attempt restoration again. Always verify critical data has transferred successfully after any interruption.
Can I transfer data without using iCloud at all?
Yes, Quick Start’s “Transfer from iPhone” option performs complete device-to-device migration without iCloud involvement. Alternatively, creating an encrypted backup on your computer via Finder or iTunes provides another iCloud-free pathway. Both methods keep all data contained within your devices rather than routing through cloud services.
More related posts
 Smells Like Teen Spirit Lyrics – Meaning, Chords and History
 Cardiff City vs Newport County – Result, Stats and Highlights
 Mrs Hinch – Biography, Products, Net Worth and Latest 2026 Updates
 Brie Larson Movies and TV Shows – Full Filmography Guide
 Portman Park Results Today – Latest Winners and Race Times
 Manchester Airport Car Parking 2025 – Compare Prices, Pre-Book and Save
 Brian Cox – Physicist and Actor Comparison Guide
 Olivia and Jackson MAFS – Still Together After 2022 Breakup?
